Gulp - Quick Guide
Gulp - Overview
What is Gulp?
Gulp is a task runner that uses Node.js as a platform. Gulp purely uses the JavaScript code and helps to run front-end tasks and large-scale web applications. It builds system automated tasks like CSS and HTML minification, concatenating library files, and compiling the SASS files. These tasks can be run using Shell or Bash scripts on the command line.
Why to use Gulp?
- It is shorter, simpler and faster as compared to other task runner.
- Uses SASS and LESS as CSS preprocessor.
- Automatically refreshes page after editing the source files.
- Easy to understand and build the Gulpfile.js because, it uses pure JavaScript code to build the task.
History
All the documentation of Gulp is covered by the CC0 license. Initially, Gulp v1.0.0 was released on January 15, 2015, and the current version of Gulp is v3.9.0.
Features
- Provides minification and concatenation.
- Uses pure JavaScript code.
- Converts LESS or SASS to CSS compilation.
- Manages file manipulation in the memory and enhances speed by using the Node.js platform.
Advantages
- Huge speed advantage over any other task runner
- Easy to code and understand.
- Easy to test the web applications..
- Plugins are simple to use and they are designed to do one thing at a time.
- Performs repetitive tasks repeatedly such as minifying stylesheets, compressing images, etc.
Disadvantages
- More number of dependencies and is a newcomer compared to Grunt.
- Using Gulp plugins, you cannot perform multiple tasks.
- Configuration is not as clean as Grunt.
Gulp - Installation
This article provides a step-by-step procedure of Gulp installation.
System Requirements for Gulp
Operating System − Cross-platform
Browser Support − IE (Internet Explorer 8+), Firefox, Google Chrome, Safari, Opera
Installation of Gulp
Step 1 − We need Node.js to run Gulp examples. To download Node.js, open the https://nodejs.org/en/, you will see a screen as shown below −
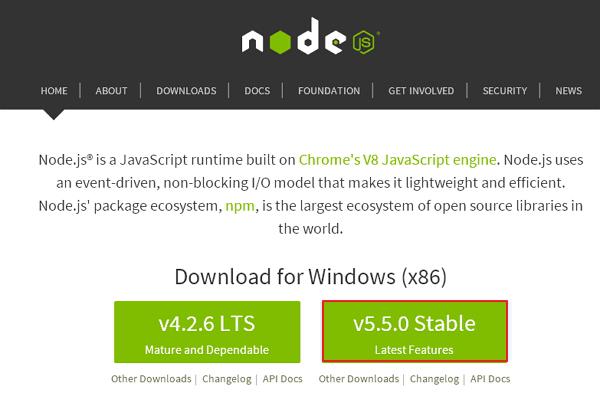
Download the latest features version of the zip file.
Step 2 − Next, run the setup to install the NodeJs on your computer.
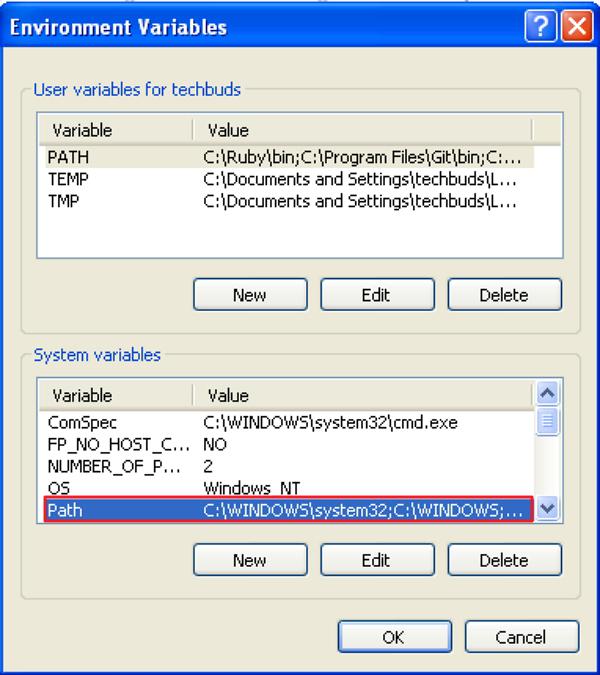
Step 3 − You need to set environment variables.
Path User Variable
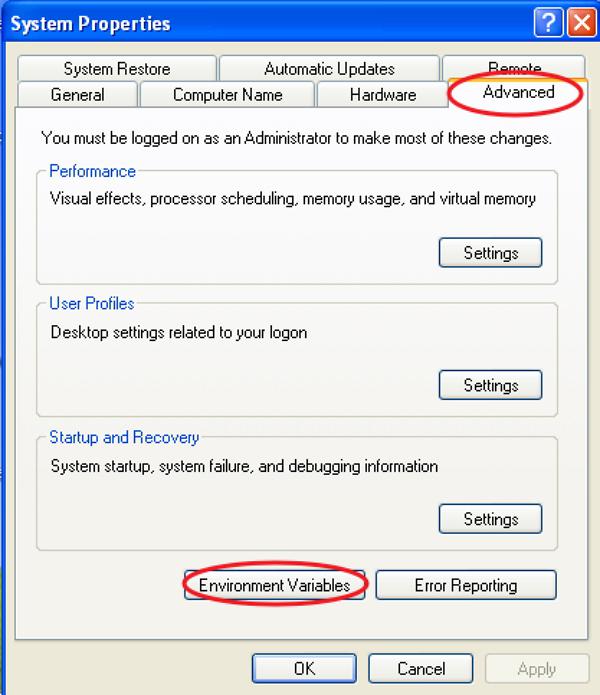
- Right-click on My Computer.
- Select Properties.
- Select Advanced tab and click ‘Environment Variables’.
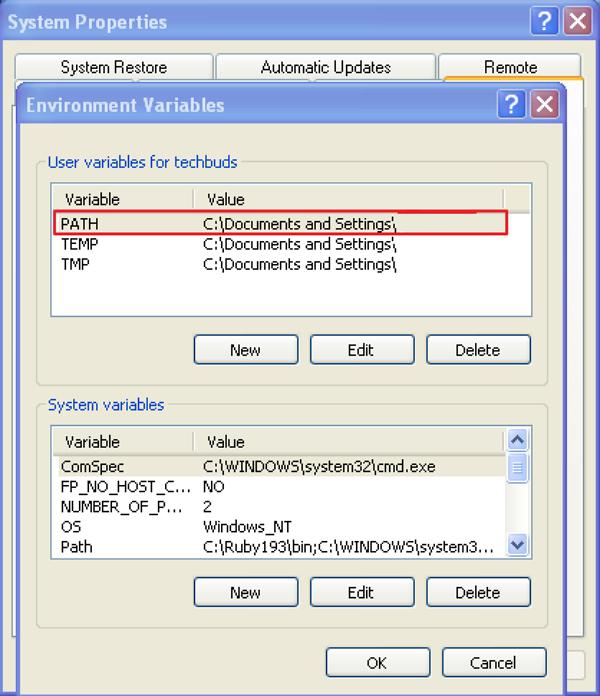
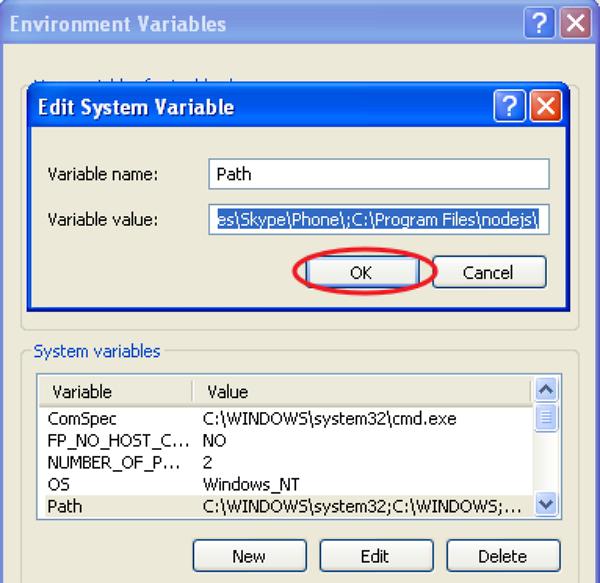
You will get an Edit User Variable window as shown in the following screenshot. Add Node.js folder path in the Variable Value field as C:\Program Files\nodejs\node_modules\npm. If the path is set already for other files, then you need to put a semicolon (;) after that and add the Node.js path as shown in the following screenshot.
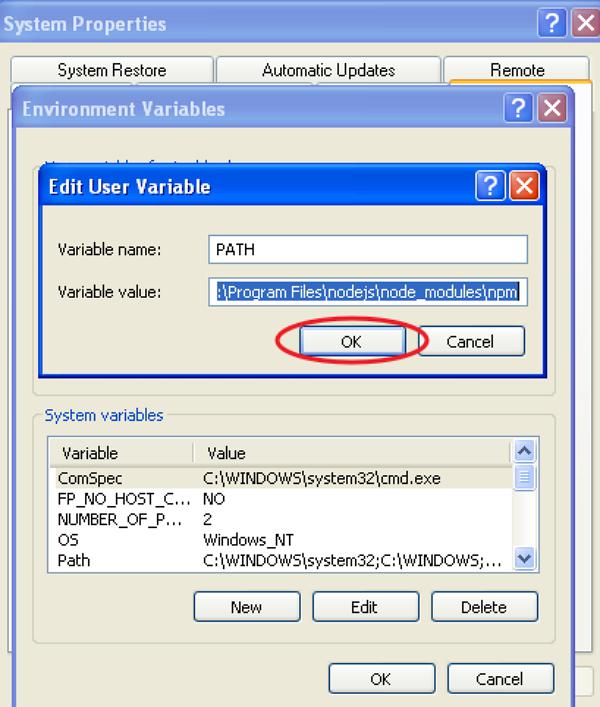
At the end, click the ‘Ok’ button.
System Variable
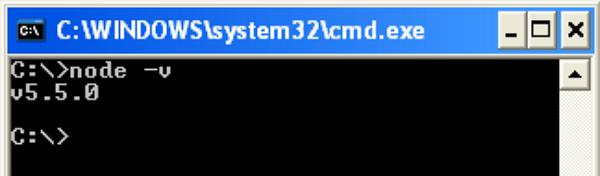
Step 4 − Open the command prompt in your system and enter the following command. It will display the installed Node.js version.
node -v
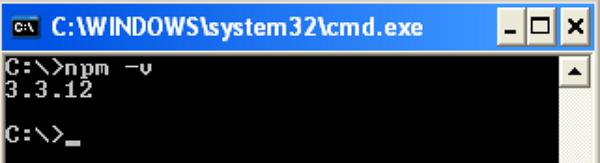
Step 5 − In the command prompt, enter the following command to display the version of npm (Node.js package manager) which is used to install modules. It will display the installed Node.js version.
npm -v
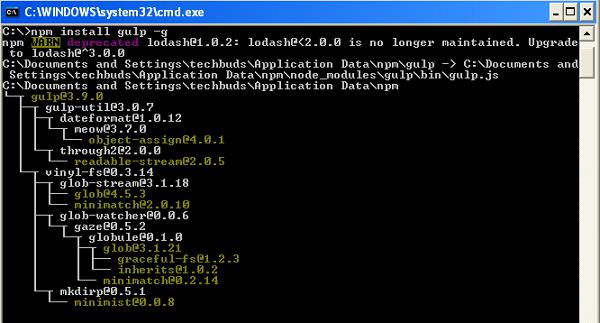
Step 6 − In the command prompt, enter the following command to install Gulp. Adding “-g” flag ensures that the Gulp is globally available for any project.
npm install gulp -g
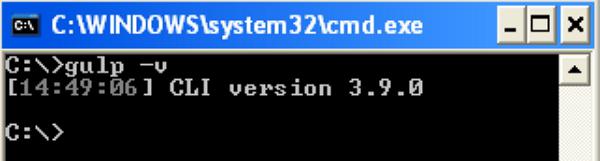
Step 7 − To verify that Gulp has been installed successfully, enter the following command to display the Gulp version.
gulp -v
Gulp - Basics
In this chapter, you will get acquainted with some basics related to Gulp.
What is a Build System?
A Build System is referred to as collection of tasks (collectively called as task runners), which automate the repetitive work.
Following is a list of some of the tasks that can be handled using the build system −
- Compilation of preprocess CSS and JavaScript.
- Minification of files to reduce its size.
- Concatenation of files into one.
- Triggering the server for automatic reloading.
- Creation of deployment builds to store the resulting files in one location.
In modern front-end workflow, the build system works with 3 components −
- Package managers
- Preprocessors
- Task runners and build tools
Package Managers
It is used to automate the installation upgrade, removal of required dependencies, clean libraries, and packages used in the development environment. Example for package managers are bower and npm.
Preprocessors
Preprocessors are very useful for an efficient modern workflow by adding an optimized syntax and additional features that compiles into its native language.
Some of the popular preprocessors are −
CSS − SASS, LESS and Stylus.
JS − CoffeeScript, LiveScript, TypeScript, etc.
HTML − Markdown, HAML, Slim, Jade, etc.
Task Runners
Task runners automate tasks like SASS to CSS conversion, minify the files, optimize images, and many other tasks used in the development workflow. Gulp is one of the task runner in the modern front-end work environment and it runs on Node.
Setting Up Your Project
To set your project in your computer, create a folder called “work” for example. The work folder contains following sub-folders and files −
Src − Location of pre-processed HTML source files and folders.
Images − Contains images which are uncompressed.
Scripts − Contains multiple pre-processed script files.
Styles − Contains multiple pre-processed CSS files.
Build − This folder will be created automatically which contains the production files.
Images − Contains compressed images.
Scripts − Single script file that contains minified codes.
Styles − Single CSS file that contains minified codes.
gulpfile.js − It is the configuration file, which is used to define our tasks.
Gulp - Developing An Application
In the previous chapters, you have studied about Gulp installation and Gulp basics which includes build system of Gulp, package manager, task runner, structure of Gulp, etc.
In this chapter, we will see the basics for developing an application, which includes the following −
- Declaring required dependencies
- Creating task for the dependencies
- Running the task
- Watching the task
Dependencies Declaration
When you are installing plugins for the application, you need to specify dependencies for the plugins. The dependencies are handled by the package manager such as bower and npm.
Let's take one plugin called gulp-imagemin to define dependencies for it in the configuration file. This plugin can be used to compress the image file and can be installed using the following command line −
npm install gulp-imagemin --save-dev
You can add dependencies to your configuration file as shown in the following code.
var imagemin = require('gulp-imagemin');
The above line includes the plug-in and it is included as an object named imagemin.
Creating Task for Dependencies
Task enables a modular approach for configuring Gulp. We need to create a task for each dependency, which we would add up as we find and install other plugins. The Gulp task will have the following structure −
gulp.task('task-name', function() {
   //do stuff here
});
Where ‘task-name’ is a string name and ‘function()’ performs your task. The ‘gulp.task’ registers the function as a task within name and specifies the dependencies on other tasks.
You can create the task for the above defined dependency as shown in the following code.
gulp.task('imagemin', function() {
   var img_src = 'src/images/**/*', img_dest = 'build/images';

   gulp.src(img_src)
   .pipe(changed(img_dest))
   .pipe(imagemin())
   .pipe(gulp.dest(img_dest));
});
The images are located in src/images/**/* which is saved in the img_srcobject. It is piped to other function created by the imagemin constructor. It compresses the images from src folder and copied to build folder by calling dest method with an argument, which represents the target directory.
Running the Task
Gulp file is set up and ready to execute. Use the following command in your project directory to run the task −
gulp imagemin
On running the task using the above command, you will see the following result in the command prompt −
C:\work>gulp imagemin
[16:59:09] Using gulpfile C:\work\gulpfile.js
[16:59:09] Starting 'imagemin'...
[16:59:09] Finished 'imagemin' after 19 ms
[16:59:09] gulp-imagemin: Minified 2 images (saved 80.81 kB - 16.9%)
Gulp - Combining Tasks
Task enables a modular approach to configure Gulp. We need to create task for each dependency, which we would add up as we find and install other plugins. The Gulp task will have following structure −
gulp.task('task-name', function() {
   //do stuff here
});
Where “task-name” is a string name and “function()” performs your task. The “gulp.task” registers the function as a task within the name and specifies the dependencies on other tasks.
Installing Plugins
Let's take one plugin called minify-css to merge and minify all CSS scripts. It can be installed by using npm as shown in the following command −
npm install gulp-minify-css --save-dev
To work with “gulp-minify-css plugin”, you need to install another plugin called “gulp-autoprefixer” as shown in the following command −
npm install gulp-autoprefixer --save-dev
To concatenate the CSS files, install the gulp-concat as shown in the following command −
npm install gulp-concat --save-dev
After installation of plugins, you need to write dependencies in your configuration file as follows −
var autoprefix = require('gulp-autoprefixer');
var minifyCSS = require('gulp-minify-css');
var concat = require('gulp-concat');
Adding Task to Gulp file
We need to create task for each dependency, which we would add up as we install the plugins. The Gulp task will have following structure −
gulp.task('styles', function() {
   gulp.src(['src/styles/*.css'])
   .pipe(concat('styles.css'))
   .pipe(autoprefix('last 2 versions'))
   .pipe(minifyCSS())
   .pipe(gulp.dest('build/styles/'));
});
The ‘concat’ plugin concatenates the CSS files and ‘autoprefix’ plugin indicates the current and the previous versions of all browsers. It minifies all CSS scripts from src folder and copies to the build folder by calling ‘dest’ method with an argument, which represents the target directory.
To run the task, use the following command in your project directory −
gulp styles
Similarly, we will use another plugin called ‘gulp-imagemin’ to compress the image file, which can be installed using the following command −
npm install gulp-imagemin --save-dev
You can add dependencies to your configuration file using the following command −
var imagemin = require('gulp-imagemin');
You can create the task for above defined dependency as shown in the following code.
gulp.task('imagemin', function() {
   var img_src = 'src/images/**/*', img_dest = 'build/images';

   gulp.src(img_src)
   .pipe(changed(img_dest))
   .pipe(imagemin())
   .pipe(gulp.dest(img_dest));
});
The images are located in “src/images/**/*” which are saved in the img_srcobject. It is piped to other functions created by the ‘imagemin’ constructor. It compresses the images from src folder and copies to the build folder by calling ‘dest’ method with an argument, which represents the target directory.
To run the task, use the following command in your project directory −
gulp imagemin
Combining Multiple Tasks
You can run multiple tasks at a time by creating default task in the configuration file as shown in the following code −
gulp.task('default', ['imagemin', 'styles'], function() {

});
Gulp file is set up and ready to execute. Run the following command in your project directory to run the above combined tasks −
gulp
On running the task using the above command, you will get the following result in the command prompt −
C:\work>gulp
[16:08:51] Using gulpfile C:\work\gulpfile.js
[16:08:51] Starting 'imagemin'...
[16:08:51] Finished 'imagemin' after 20 ms
[16:08:51] Starting 'styles'...
[16:08:51] Finished 'styles' after 13 ms
[16:08:51] Starting 'default'...
[16:08:51] Finished 'default' after 6.13 ms
[16:08:51] gulp-imagemin: Minified 0 images
Gulp - Watch
The Watch method is used to monitor your source files. When any changes to the source file is made, the watch will run an appropriate task. You can use the ‘default’ task to watch for changes to HTML, CSS, and JavaScript files.
Update Default Task
In the previous chapter you have learnt how to gulp combining tasks using default task. We used gulp-minify-css, gulp-autoprefixer and gulp-concatplugins, and created styles task to minify CSS files.
To watch CSS file, we need to update the ‘default’ task as shown in the following code:
gulp.task('default', ['styles'], function() {
   // watch for CSS changes
   gulp.watch('src/styles/*.css', function() {
      // run styles upon changes
      gulp.run('styles');
   });
});
All the CSS files under work/src/styles/ folder will be watched and upon changes made to these files, the styles task will be executed.
Run Default Task
Run the ‘default’ task using the following command.
gulp
After executing the above command, you will receive the following output.
C:\work>gulp
[17:11:28] Using gulpfile C:\work\gulpfile.js
[17:11:28] Starting 'styles'...
[17:11:28] Finished 'styles' after 22 ms
[17:11:28] Starting 'default'...
[17:11:28] Finished 'default' after 21 ms
Whenever any changes are made to CSS files, you will receive the following output.
C:\work>gulp
[17:11:28] Using gulpfile C:\work\gulpfile.js
[17:11:28] Starting 'styles'...
[17:11:28] Finished 'styles' after 22 ms
[17:11:28] Starting 'default'...
[17:11:28] Finished 'default' after 21 ms
gulp.run() has been deprecated. Use task dependencies or gulp.watch task
   triggering instead.
[17:18:46] Starting 'styles'...
[17:18:46] Finished 'styles' after 5.1 ms
The Watch process will remain active and respond to your changes. You can press Ctrl+Cto terminate the monitoring process and return to the command line.
Gulp - Live Reload
Live Reload specifies the changes in the file system. BrowserSync is used to watch all HTML and CSS files in the CSS directory and perform live reload to the page in all browsers, whenever files are changed. BrowserSync makes the workflow faster by synchronizing URLs, interactions, and code changes across multiple devices.
Installing BrowserSync Plugin
The BrowserSync plugin provides cross-browser CSS injection and can be installed using the following command.
npm install browser-sync --save-dev
Configuring BrowserSync Plugin
To use BrowserSync plugin, you need to write dependency in your configuration file as shown in the following command.
var browserSync = require('browser-sync').create();
You need to create task for BrowserSync to work with server using Gulp. Since you are running server, so you need to tel BrowserSync about the root of your server. Here, we are using base directory as 'build'.
gulp.task('browserSync', function() {
   browserSync.init({
      server: {
         baseDir: 'build'
      },
   })
})
You can also inject new styles into the browser using the following task for CSS file.
gulp.task('styles', function() {

   gulp.src(['src/styles/*.css'])
   .pipe(concat('style.css'))
   .pipe(autoprefix('last 2 versions'))
   .pipe(minifyCSS())
   .pipe(gulp.dest('build/styles/'))
   .pipe(browserSync.reload({
      stream: true
   }))
});
Before creating task for BrowserSync, you need to install the plugins using package manager and write dependencies in your configuration file as defined in this chapter.
When you are done with the configuration, run both BrowserSync and watchTask for the occurrence of live reloading effect. Instead of running two command lines separately, we will run them together by adding browserSynctask along with the watchTask as shown in the following code.
gulp.task('default', ['browserSync', 'styles'], function (){
   gulp.watch('src/styles/*.css', ['styles']);
});
Run the following command in your project directory to execute the above combined tasks.
gulp
After running the task using the above command, you will get the following result in the command prompt.
C:\project>gulp
[13:01:39] Using gulpfile C:\project\gulpfile.js
[13:01:39] Starting 'browserSync'...
[13:01:39] Finished 'browserSync' after 20 ms
[13:01:39] Starting 'styles'...
[13:01:39] Finished 'styles' after 21 ms
[13:01:39] Starting 'default'...
[13:01:39] Finished 'default' after 15 ms
[BS] 1 file changed (style.css)
[BS] Access URLs:
 ------------------------------------
       Local: http://localhost:3000
    External: http://192.168.1.4:3000
 ------------------------------------
          UI: http://localhost:3001
 UI External: http://192.168.1.4:3001
 ------------------------------------
[BS] Serving files from: build
It will open the browser window with the URL http://localhost:3000/. Any changes made to the CSS file will reflect in the command prompt and browser reloads automatically with the changed styles.
Gulp - Optimizing CSS and JavaScript
In this chapter, you will learn how to optimize CSS and JavaScript. Optimizing is required to remove unnecessary data (for e.g. spaces and unused characters) from the source files. It reduces the size of the files and allows them to load faster
Install Plugins to Optimize CSS and JavaScript
Go to “work” directory from your command line and install “gulp-uglify”, “gulp-minify-css” and “gulp-concat” plugins by using the following command −
npm install gulp-uglify gulp-minify-css gulp-concat
Declare Dependencies and Create Tasks
In your configuration file gulpfile.js, first declare the dependencies as shown in the following code.
var gulp = require('gulp');
var concat = require('gulp-concat');
var uglify = require('gulp-uglify');
var minify = require('gulp-minify-css');
Next, you need to create tasks for optimizing CSS and JavaScript as shown in the following code.
gulp.task('js', function(){
   gulp.src('src/scripts/*.js')
   .pipe(concat('script.js'))
   .pipe(uglify())
   .pipe(gulp.dest('build/scripts/'));
});

gulp.task('css', function(){
   gulp.src('src/styles/*.css')
   .pipe(concat('styles.css'))
   .pipe(minify())
   .pipe(gulp.dest('build/styles/'));
});

gulp.task('default',['js','css'],function(){
});
The js task will accepts .js files from src/scripts/ folder. It concatenates and uglifies the js files, then produces build/scripts/script.js file.
The CSS task will accept .css files from src/styles/ folder. It concatenates and minifies CSS files, then produces build/styles/styles.css file.
Run the Tasks
The configuration file is set up and ready to execute. Use the following command to run the task.
gulp
On running the task using the above command, you will receive the following result in the command prompt.
C:\work>gulp
[13:16:34] Using gulpfile C:\work\gulpfile.js
[13:16:34] Starting 'js'...
[13:16:34] Finished 'js' after 24 ms
[13:16:34] Starting 'css'...
[13:16:34] Finished 'css' after 6.05 ms
[13:16:34] Starting 'default'...
[13:16:34] Finished 'default' after 5.04 μs
Gulp - Optimizing Images
In this chapter, you will learn how to optimize images. Optimizing will reduce the size of the images and assist in faster loading.
Install Plugins to Optimize Images
Go to “work” directory from your command line and install “gulp-changed” and “gulp-imagemin” plugins by using the following commands.
npm install gulp-changed --save-dev
npm install gulp-imagemin --save-dev
Declare Dependencies and Create Tasks
In your configuration file gulpfile.js, first declare the dependencies as shown in the following command.
var gulp = require('gulp');
var changed = require('gulp-changed');
var imagemin = require('gulp-imagemin');
Next, you need to create tasks for optimizing images as shown in the following code.
gulp.task('imagemin', function() {
   var imgSrc = 'src/images/*.+(png|jpg|gif)',
   imgDst = 'build/images';

   gulp.src(imgSrc)
   .pipe(changed(imgDst))
   .pipe(imagemin())
   .pipe(gulp.dest(imgDst));
});

gulp.task('default',['imagemin'],function(){
});
The imagemin task will accept png, jpg and gif images from src/images/ folder and minify them before writing it into the destination. The changed() ensures that only the new files are passed in each time for minifying. The gulp-changed plugin will only process the new files and hence utilized precious time.
Run the Tasks
The configuration file is set up and ready to execute. Use the following command to run the task.
gulp
On running the task using the above command, you will receive the following result in the command prompt.
C:\work>gulp
[15:55:49] Using gulpfile C:\work\gulpfile.js
[15:55:49] Starting 'imagemin'...
[15:55:49] Finished 'imagemin' after 23 ms
[15:55:49] Starting 'default'...
[15:55:49] Finished 'default' after 23 μs
[15:55:54] gulp-imagemin: Minified 1 images (saved 558.3 kB - 8.3%)
Gulp - Useful Plugins
Gulp provides some useful plugins to work with HTML & CSS, JavaScript, Graphics and some other things as described in the following tables.
HTML & CSS Plugins
| Sr.No. |
Plugin & Description |
| 1 |
autoprefixer
It automatically includes prefixes to CSS properties.
|
| 2 |
gulp-browser-sync
It is used to watch all HTML and CSS files in the CSS directory and performs the live reload to the page in all browsers, whenever files are changed
|
| 3 |
gulp-useref
It is used to replace references to non-optimized scripts or stylesheets.
|
| 4 |
gulp-email-design
It creates HTML email templates which converts CSS styles to inline.
|
| 5 |
gulp-uncss
It optimizes CSS files and finds unused and duplicated styles.
|
| 6 |
gulp-csso
It is a CSS optimizer, which minimizes CSS files resulting in smaller file size.
|
| 7 |
gulp-htmlmin
It minimizes HTML files.
|
| 8 |
gulp-csscomb
It is used to make style formatter for CSS.
|
| 9 |
gulp-csslint
It specifies a CSS linter.
|
| 10 |
gulp-htmlhint
It specifies a HTML validator.
|
JavaScript Plugins
| Sr.No. |
Plugin & Description |
| 1 |
gulp-autopolyfiller
It is same like autoprefixer which includes necessary polyfills for JavaScript.
|
| 2 |
gulp-jsfmt
It is used for searching specific code snippets.
|
| 3 |
gulp-jscs
It is used to check JavaScript code style.
|
| 4 |
gulp-modernizr
It specifies what HTML, CSS and JavaScript features the user's browser has to offer.
|
| 5 |
gulp-express
It starts gulp express.js web server.
|
| 6 |
gulp-requirejs
It uses require.js to combine require.js AMD modules into one file. |
| 7 |
gulp-plato
It generates complexity analysis reports.
|
| 8 |
gulp-complexity
It analyzes the complexity and maintainability of code.
|
| 9 |
fixmyjs
It fixes JSHint results.
|
| 10 |
gulp-jscpd
It is used as copy/paste detector for source code.
|
| 11 |
gulp-jsonlint
It is JSON validator.
|
| 12 |
gulp-uglify
It minifies the JavaScript files.
|
| 13 |
gulp-concat
It concatenates the CSS files. |
Unit Tests Plugins
| Sr.No. |
Plugin & Description |
| 1 |
gulp-nodeunit
It runs node unit tests from Gulp.
|
| 2 |
gulp-jasmine
It is used to report the issues related to the output.
|
| 3 |
gulp-qunit
It provides basic console output for QUnit tests and uses PhantomJS node module and PhantomJS runner QUnit plugin.
|
| 4 |
gulp-mocha
It specifies the thin wrapper around Mocha and runs the Mocha tests.
|
| 5 |
gulp-karma
It has been deprecated in Gulp.
|
Graphics Plugins
| Sr.No. |
Plugin & Description |
| 1 |
gulpicon
It generates sprites from SVG and converts them to PNG.
|
| 2 |
gulp-iconfont
It is used with web fonts to create WOFF, EOT, TTF files from SVG.
|
| 3 |
gulp-imacss
It transforms image files into data URIs and places them into a single CSS file.
|
| 4 |
gulp-responsive
It generates responsive images for different devices
|
| 5 |
gulp-sharp
It is used to change and resize the orientation and background of the image.
|
| 6 |
gulp-svgstore
It combines SVG files into one with <symbol> elements.
|
| 7 |
gulp-imagemin & gulp-tinypng
It is used for compressing the images such as PNG, JPEG, GIF, SVG.
|
| 8 |
gulp-spritesmith
It is used for creating spritesheet from set of images and CSS variables.
|
Compilers Plugins
| Sr.No. |
Plugin & Description |
| 1 |
gulp-less
It provides LESS plugin for Gulp.
|
| 2 |
gulp-sass
It provides SASS plugin for Gulp.
|
| 3 |
gulp-compass
It provides compass plugin for Gulp.
|
| 4 |
gulp-stylus
It is used for keeping stylus in CSS.
|
| 5 |
gulp-coffee
It provides coffeescript plugin for Gulp.
|
| 6 |
gulp-handlebars
It provides handlebars plugin for Gulp.
|
| 7 |
gulp-jst
It provides underscore templates in JST.
|
| 8 |
gulp-react
It specifies Facebook React JSX templates into JavaScript.
|
| 9 |
gulp-nunjucks
It specifies Nunjucks templates in JST.
|
| 10 |
gulp-dustjs
It specifies Dust templates in JST. |
| 11 |
gulp-angular-templatecache
It specifies AngularJS templates in the templateCache.
|
Other Plugins
| Sr.No. |
Plugin & Description |
| 1 |
gulp-grunt
It runs the Grunt tasks from Gulp
|
| 2 |
gulp-watch
It watches the files whenever changes are made.
|
| 3 |
gulp-notify
It notifies the error message whenever a task fails.
|
| 4 |
gulp-git
It allows to use Git commands.
|
| 5 |
gulp-jsdoc
It creates JavaScript documentation for Gulp.
|
| 6 |
gulp-rev
It provides static asset revisioning to file names.
|
| 7 |
gulp-bump
It increases the versions in JSON package.
|
| 8 |
gulp-bower-files
It is used to inject bower packages.
|
| 9 |
gulp-removelogs
It removes console.log statements. |
| 10 |
gulp-preprocess
It preprocesses HTML, JavaScript and other files based on context or environment configuration.
|
| 11 |
gulp-duration
It specifies the duration for Gulp tasks.
|
| 12 |
gulp-changed & gulp-newer
It runs the modified files and newer files.
|
| 13 |
gulp-connect
It is used to run a web server with LiveReload.
|
| 14 |
gulp-shell
It runs Shell commands.
|
| 15 |
gulp-ssh
It connects by using SSH and SFTP tasks.
|
| 16 |
gulp-zip
It compresses the files and folders.
|
| 17 |
gulp-clean & gulp-copy |
The gulp-clean plugin removes files and folders and the gulp-copy plugin copies the files from source to new destination.
| 18 |
gulp-filesize
It specifies the file size in human readable format.
|
| 19 |
gulp-util
It provides utilities for gulp plugins.
|
Gulp - Cleaning Unwanted Files
In this chapter, you will learn how to clean generated files. As we are automatically generating the files, make sure that unnecessary files should be deleted before running your build. This procedure is called cleaning. The del plugin can be used for this purpose.
Installing del Plugins
In your command line install the plugin by entering the following command.
npm install del --save-dev
Declare Dependencies and Create Tasks
In your configuration file gulpfile.js, declare the dependencies as shown in the following command.
var del = require('del');
Next, create a task as shown in the following code.
gulp.task('clean:build', function() {
   return del.sync('build');
});
The above task will clean entire build. The clean task clears any image catches and removes any old files present in build.
It is possible to clean only specific file or folder and leave some of them untouched as illustrated in the following code.
gulp.task('clean:build', function() {
   //return del.sync('build');
   return del([
      'build/temp/',
      // instructs to clean temp folder
      '!build/package.json'
      // negate to instruct not to clean package.json file ]);
});
In the above task, only the temp folder will be cleaned leaving package.json untouched.